
- Updated on
Wedding Seating Chart and Table Plan: Who Sits Where, How Many Tables, When to Finalise
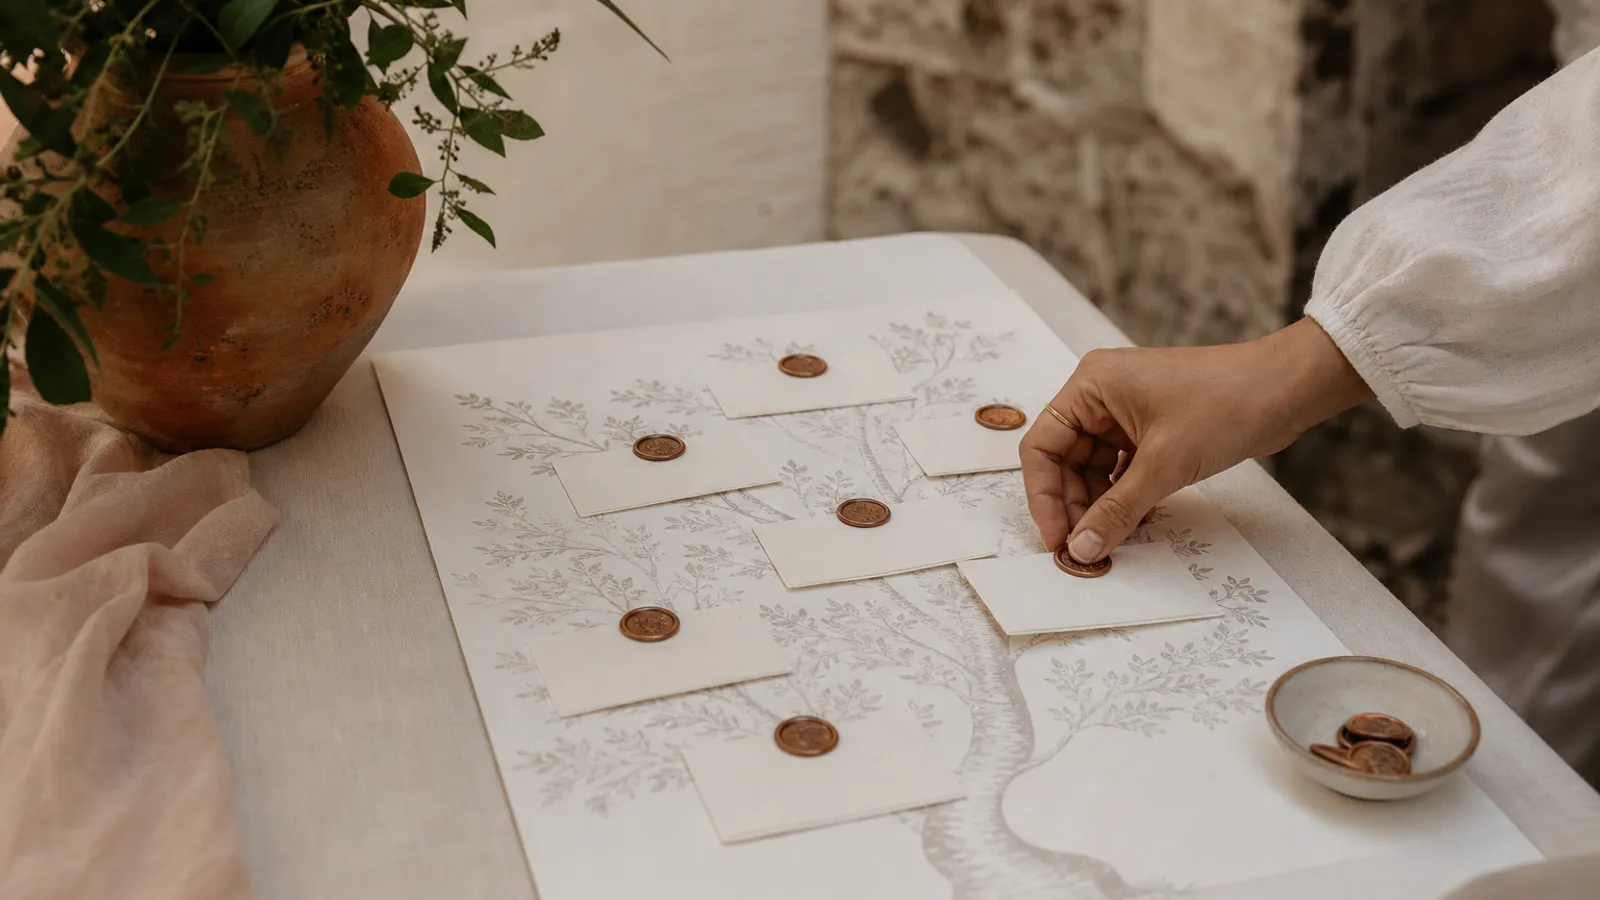
If you are serving a sit-down wedding breakfast, assign tables. Above about 50 day guests the plan stops being optional, and even at 30 the couple's table and the parents' seats should be decided in advance. Everything else in this guide follows from that decision: which table shapes to ask the venue for, how many you need, who sits at the top table, where the awkward cases go, and what the caterer needs in the final fortnight.
The vocabulary first, because most pages on this topic are American. In the UK the display at the door is a table plan or seating plan; Americans call it a seating chart and often replace it with escort cards. The long table facing the room is the top table here and the head table there. This guide uses the British terms and explains the American variants where they change a decision.
Do you need a table plan at all?
For a seated meal with more than about 50 guests, yes. Guests find a seat faster, couples are not split by accident, and the caterer knows which meal goes where. Under 50, assigned tables with free seat choice is enough. Skip the plan only for an evening-only reception or a cocktail-style party without a formal meal.
The 50-guest line appears in The Knot's etiquette guide and on Zola's seating page, and UK planners draw it in the same place. Ode Events puts it plainly: a sit-down wedding breakfast needs a plan, a buffet or sharing boards can use assigned tables with free seats, and an evening-style reception with no formal meal needs nothing.
Guests agree. The only survey with numbers is old but clear: in a February 2006 YouGov poll of UK adults, 51 percent preferred an assigned seat, 33 percent an assigned table with free seat choice and only 13 percent a free-for-all. Among over-50s, just 8 percent wanted unassigned seating. Your grandparents would like to know where they are sitting.
There are three levels of control, and you choose one for the whole room:
| Level | What the guest experiences | Best for |
|---|---|---|
| Assigned seats | A place card at every setting fixes the chair | Formal plated dinners, pre-ordered menu choices, families with politics |
| Assigned tables | The plan gives a table; guests pick any chair at it | Most UK weddings, buffets, sharing menus |
| Open seating | No plan | Evening receptions, very small dinners, cocktail-style parties |
One British detail changes the arithmetic before you start: day guests and evening guests. Bridebook's 2026 UK Wedding Report puts the average wedding at 74 guests at the ceremony plus 21 additional evening guests. Only the day guests sit down to the wedding breakfast, so the plan covers the day list, and the evening arrivals need standing room, a few spare chairs and a clear route to the bar, not a seat with a name on it. Tell the venue both numbers separately, because catering is priced per head for the meal and per head again for evening food.
Table plan, escort cards or place cards: what goes at the entrance
You need one entrance system that tells each guest their table: a table plan on a board, or escort cards laid out alphabetically. Place cards on the tables are a second, optional layer that fixes the exact chair. Use place cards when the caterer serves pre-ordered menu choices to specific seats, or when family dynamics make the chair matter.
The traditional British arrangement, as Debrett's describes it, is both: a table plan at the entrance to the dining room showing every table with its names, and a name card at each place setting. The alternative Debrett's allows is the escort-card idea in its English form, little envelopes with each guest's name and a card inside giving the table. Hitched's answer to the surname question is practical: first names only reads friendlier, but use full names when two guests share a first name or when the wedding is formal.
Three rules make any display work on the day:
- List names alphabetically by surname rather than table by table. Above a few dozen guests a by-table list creates a queue while people scan every column for their own name.
- Put the board where every guest passes during the drinks reception, at eye height, lit, with a dark backing if you use clear acrylic.
- Number or name the tables so they can be found from across the room. Names are fine, but pair them with a small floor sketch or number them in a pattern, such as odd tables left of the door and even tables right, or clockwise from the entrance.
Escort cards have one real advantage over a printed board: a single cancellation means rewriting one card rather than a whole panel. A board has one advantage over cards: nobody has to hunt through a hundred envelopes with a drink in one hand. Ode notes a third option now used by some UK couples, a seating section on the wedding website where guests search their own name, which also lets guests with access needs see the layout in advance.
Who sits at the top table?
Traditionally eight people, seen from the room left to right: chief bridesmaid, groom's father, bride's mother, groom, bride, bride's father, groom's mother, best man. The couple sits in the centre and the parents are crossed so each sits beside new in-laws. Modern couples freely replace this with a sweetheart table, a family long table or no top table at all.
That order is the one Debrett's publishes, the one Hitched calls the traditional eight, and the one UK planners quote to Hello. It exists for a historical reason: the bride's parents once paid for and hosted the wedding, so they flank the couple as hosts. Debrett's own view is that with couples now hosting themselves the convention is redundant, and that a long line facing the room works well for speeches but is not very sociable and can feel like being on public display.
The American head table is a different animal, and you will meet it on every US site. There the parents do not sit with the couple. They host their own tables nearby, often with grandparents and the officiant, while the head table seats the couple and the wedding party. The classic order, as Emily Post set it down in 1922, puts the bride to the groom's right, the best man beside the bride and the maid of honour beside the groom, with bridesmaids and groomsmen alternating outward. Attendants' partners used to be seated elsewhere; The Knot now calls that rule generally ignored. Borrow the idea if you like it, but expect British parents to assume they are on the top table until told otherwise.
Top table layouts used at UK weddings
Pick a layout to see who sits where, as the room sees it. The traditional order is first; the others are the arrangements Debrett's, Hitched, TopTablePlanner and UK planners describe as normal today.
Seen from above; the chairs at the front face the room
Eight seats on one side of a long table facing the room. Parents are crossed so each sits next to new in-laws, and the chief bridesmaid and best man anchor the ends. Assumes two sets of married parents.
8 seats
- Wedding party
- Parents
- The couple
Two practical points decide the top table more often than etiquette does. First, speeches. Debrett's advice is that the father of the bride, the best man and the groom should sit at the same table or adjacent ones, in a central position where they are visible and audible, which is the strongest remaining argument for a long top table facing the room. Second, the wedding party's partners. A traditional top table of eight leaves the best man's wife at table nine with strangers, which is why Hitched's wedding-party table with partners included exists.
If you have a toastmaster or the venue provides a master of ceremonies, they check the plan and the place cards before guests enter, announce the top table if you want it announced, and tell the room where the board is. Give them the final plan the day before, not on the morning.
Same-sex couples and uneven wedding parties should ignore the alternating pattern. Debrett's says the guidelines adapt easily; Hitched says there is no right or wrong. Sit the people you most want beside you, then place the honour attendants at the ends.
Divorced or separated parents, step-parents and new partners
The most common UK solution is for each parent to host their own table with their partner and their side of the family, at the same distance from the couple, with the same table size and the same flowers, while the couple takes a sweetheart, wedding-party or family table. Tell both parents the plan early. Nobody reads anything into it.
Ode Events lists the options in roughly the order UK couples use them. Each parent hosts a table, described above. Both parents on the top table with the couple or other family between them, which works only when relations are civil. One parent on the top table, usually whoever raised you, and the other hosting a table of honour nearby, handled by telling both in advance rather than letting them find out from the board. Debrett's adds a kind detail for the separate-tables version: flank each parent with new in-laws and members of the wedding party, bridesmaids or ushers, so they feel integral rather than parked.
Two rules that outrank the etiquette books
Equal status: same distance from the couple, same table size, same decoration, for both parents. And no surprises: never seat divorced parents together without asking each of them separately, and never let a parent discover the arrangement from the table plan. A step-parent of twenty years belongs near the front whatever the tradition says. A new partner of three months can reasonably sit a table back.
If the two are not on speaking terms, place them on opposite sides of the room and out of each other's eye line during the speeches, and brief the coordinator, the toastmaster and the photographer so nobody is asked to pose together. Decide all of this with your partner months out. Do not relitigate it in the final week when a cousin cancels.
How many guests fit at each table? UK sizes
A 5ft round (152 cm) seats eight comfortably and ten at a squeeze. A 6ft round (183 cm) seats ten, twelve at most. A 6ft trestle seats six, three a side, or eight with the ends used. Plan on the comfortable number if you have charger plates, wide chairs or a formal place setting.
UK venues and hire companies stock imperial sizes and label them in feet, so the 150 cm and 180 cm tables in the calculators below are the 5ft and 6ft rounds you will actually be offered. The numbers agree across BE Event Hire, City Furniture Hire, My Event Hire and venue fact sheets such as Crown Hall Farm, which stocks rounds for ten and recommends eight or nine for comfort. Debrett's calls rounds of 8 to 10 the most sociable table there is, and TopTablePlanner caps rounds at ten because above that guests cannot talk across the table.
| Table | Comfortable | Maximum | Notes |
|---|---|---|---|
| 4ft round (122 cm) | 6 | 8 | Small family groups, kids' table, a two-couple table |
| 5ft round (152 cm) | 8 | 10 | The standard UK wedding round; 8 with chargers or formal settings |
| 5ft 6in round (168 cm) | 9 | 11 | Some hotels and marquee hirers; check what the venue has |
| 6ft round (183 cm) | 10 | 12 | Needs a larger centrepiece; talking across it is hard |
| 6ft x 2ft 6in trestle (183 x 76 cm) | 6 | 8 | 3 a side; ends only if the table is not in a row |
| 6ft x 3ft trestle (183 x 91 cm) | 6 | 8 | The width that allows sharing platters between settings |
| 8ft trestle (244 x 76 cm) | 8 | 10 | Less common in UK stock; 4 a side, ends make it feel like a head and foot |
| Sweetheart, 4ft x 2ft 6in | 2 | 2 | Also a 4ft round |
Chairs move the numbers. Standard banqueting and Chiavari chairs are 41 to 46 cm wide and match the figures above. Cross-back and farmhouse chairs are wider and cost one seat per table; upholstered armchairs cost two. A long table takes one guest per 60 cm of edge for a formal setting, and about 50 cm for a casual one, which is the rule behind six on a 6ft and eight on an 8ft.
Round, trestle, king's table or U: what each shape costs in floor and conversation
Sizes are the imperial hire stock UK venues carry, shown in centimetres. Footprints include chairs and a 150 cm walkway between table edges, the spacing UK hire companies quote.
The default in hotels, country houses and most barns. Everyone at the table can talk to everyone, and a waiter reaches all eight plates from the perimeter, which is why caterers prefer it for plated service.
- Size
- Ø 150 cm
- Seats
- 8–10
- Floor incl. walkway
- 9 m²
- 1.1 m² per guest
Best for
Most weddings from 40 to 200 day guests, plated or buffet service, tables of friends who already know each other.
Watch out
Ten chairs will not tuck under. Round down to eight with charger plates, and remember rounds lose 10 to 15 percent of the floor to the gaps between circles.
Which shape to choose comes down to three trade-offs. Rounds give the best conversation and the fastest plated service but use the most floor. Long rows seat more people per square metre and suit sharing platters, but each guest talks to two or three neighbours and staff cannot reach across the table. Most UK weddings between 80 and 150 guests end up mixed: one long top or family table in the prime position and rounds for everyone else, which photographs the wedding party together and keeps the rest of the room sociable.
How many tables, and how big a room?
Subtract the top table from your confirmed day guests, divide by the comfortable seats per table and round up. Seventy-four guests with a top table of eight is 66 guests at nine 5ft rounds of eight, with six spare seats. Allow 1.2 to 1.5 square metres per guest for rounds including walkways, then add the dance floor, bar and band.
How many tables, and how big a room?
Start from confirmed guests, pick the tables your venue has, and see how many you need and how much floor the room must give you.
Ø 150 cm
- Guest tables
- 9
- Empty seats
- 6
- Dining area
- 95 m²
- Room to ask for
- 128–132 m²
- Dance floor: about 11–15 m²
- Roughly 3 × 3 tables, about 9 × 9 m of dining space
Estimate based on Round tables, 150 cm with a 150 cm walkway between tables, 0.15–0.2 m² of dance floor per guest and 20% on top for bar, band and circulation. Check it against your venue's floor plan.
Draw this room to scaleThe room figure is the one couples miss. UK hire companies and the venue-capacity guide from Expo Direct converge on 1.2 to 1.5 m² per seated guest for rounds with chairs and walkways, and about 1 m² per guest for long rows, which is why a barn that seats 120 on trestles seats about 100 on rounds. The spacing behind those numbers is 150 cm between the edges of neighbouring tables: two pushed-in chairs of about 45 cm and a 60 cm path for guests and staff. Virginia's Furniture Hire and AbraHire quote 1.2 to 1.5 m between rectangles and 1.8 m where staff need a clear service route.
Then the dance floor. Social Tables' method, which UK hirers echo, is about 0.4 m² per dancer with a third to half of guests dancing at once, so roughly 0.15 to 0.2 m² per invited guest. For 100 guests that is a 4 x 4 m floor; Virginia's suggests 4 x 4 m for 100, 5 x 5 m for 150 and 6 x 6 m for 200. Expo Direct's warning is the useful one: a 6 x 6 m dance floor removes 25 to 30 seated places from a room, so if the venue's stated capacity was measured without a dance floor, ask for the seated-with-dancing number.
Fire safety is the venue's responsibility, not yours, but knowing the rule helps you read their floor plan. The government's fire safety risk assessment guide for small and medium places of assembly, which covers village halls, hotels, barns and marquees for up to 300 people, asks for gangways of at least 1.05 m to the exits and escape routes never narrower than 750 mm, or 900 mm where wheelchair users are expected. When a venue says a table cannot go where you want it, that is usually why. Most UK weddings sit well inside these limits: Bridebook's 2026 report has 41 percent of receptions under 60 guests, and the 2026 WeddingDates survey puts the average at 76, with 17 percent of couples expecting more than 100.
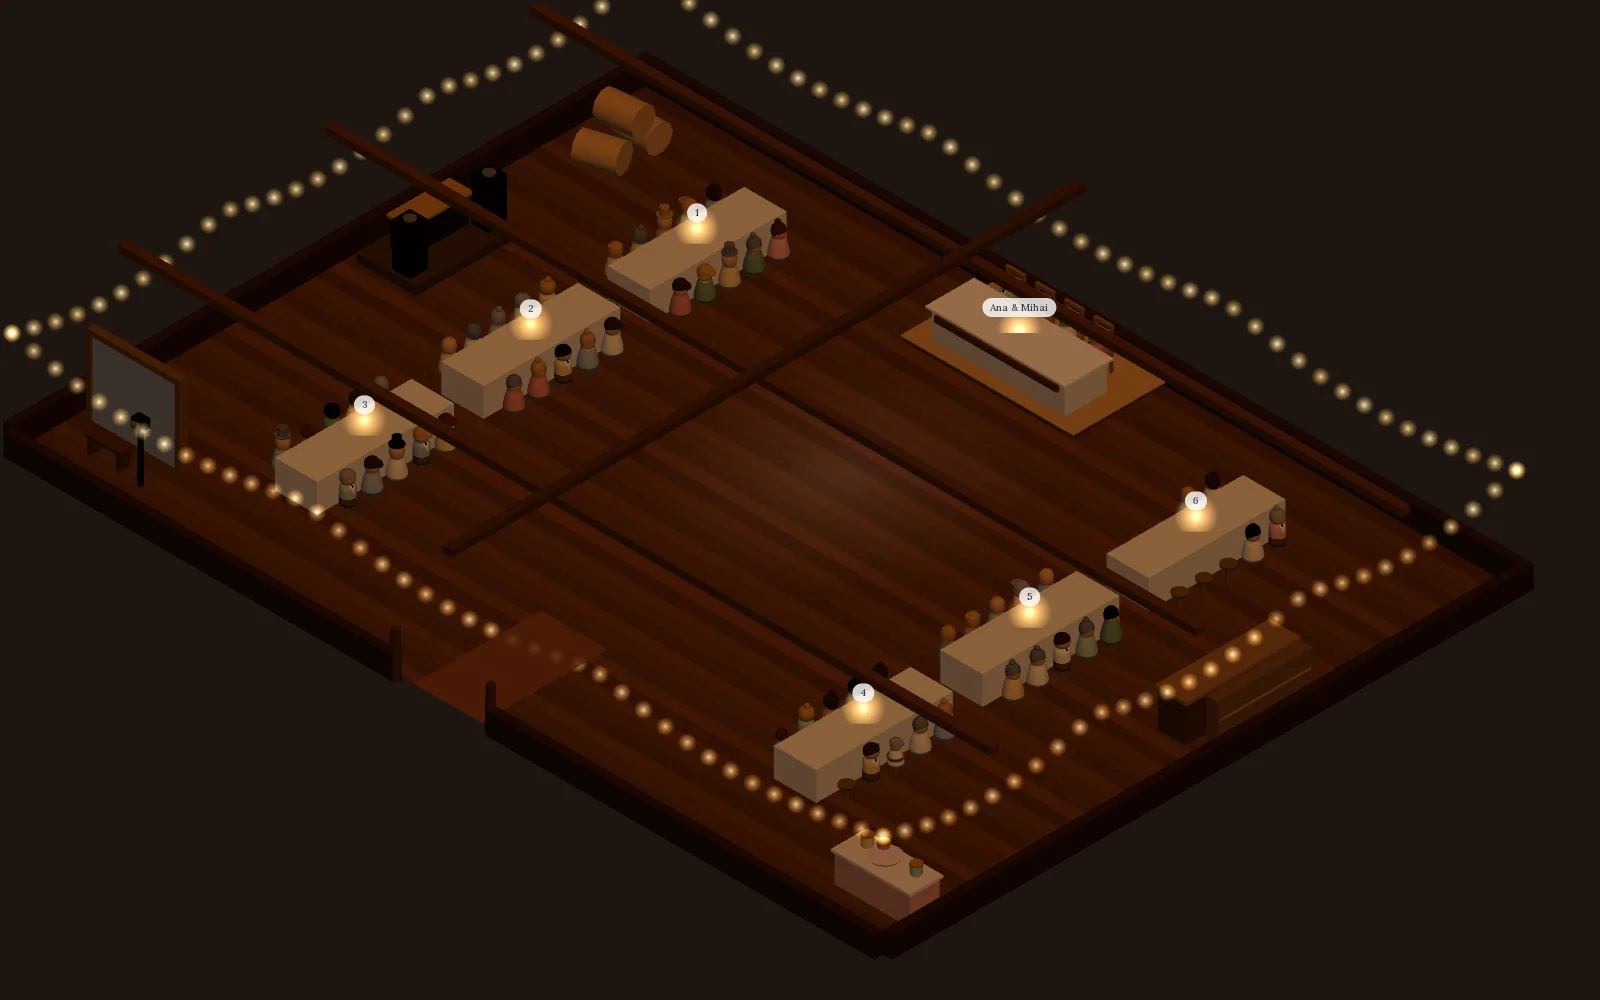
Visual table planner
Draw your venue to scale before you argue about who sits where
Saventify's visual table planner builds the room in 3D at real size: 5ft and 6ft rounds, trestle rows, the top table and the venue's own furniture. Guests who confirmed through the invitation's RSVP arrive grouped by family, you drag each onto a chair or let auto-seat place the rest, and a counter shows how many confirmed guests are still standing. Included in the one-time price of the invitation.
Included with every published invitation
The method, from RSVP deadline to venue hand-off
Sketch the structure early and place names late. Decide table shapes, the top table style and the rough groups as soon as invitations go out. Assign names only after the RSVP deadline, four to six weeks before the day. Finish the first full pass three weeks out, hand the venue its numbers and plan two weeks out, then stop editing.
UK timings anchor this. Hitched's schedule sends invitations eight to twelve weeks before the wedding with an RSVP deadline four to six weeks out, and Ode explains why the deadline sits there: it leaves a clear week or two for the plan after the chasing is done. Venue contracts fix the other end. The Old Deanery in Ripon and the University of Aberdeen's wedding terms both require final numbers 14 days before, the latter together with menu choices and the table plan. Farbridge in West Sussex asks for final numbers four weeks before and allows no changes inside two weeks. All three charge the final number even if fewer guests turn up, and apply a minimum agreed at booking. Read yours before you set the RSVP date, and count backwards from it.
| When | What to do | Why |
|---|---|---|
| 12 to 8 weeks before | Get the venue floor plan and table stock; decide shapes and top table style; sketch groups | The structure does not depend on replies |
| 6 to 4 weeks before | RSVP deadline; chase non-repliers; order the display design with blank name panels | Names change until the deadline passes |
| 4 to 3 weeks before | Place the couple, parents, grandparents and wedding party first; then groups; then individuals | The anchors resolve most of the politics |
| 3 to 2 weeks before | Family review; fix the awkward cases; confirm dietary needs and menu choices per guest | Venues want the plan with the final numbers |
| 14 days before | Final numbers and plan to the venue and caterer; send names to the printer or calligrapher | The number you give is the number you pay for |
| 3 days before | Change freeze except for emergencies; two printed copies to the coordinator | Reprinting a board for one cancellation is not worth it |
Work in this order, because each step makes the next one smaller.
- Get the floor plan with the doors, bar, dance floor, band position, kitchen door and any pillars marked, plus the venue's table sizes and counts. If you are still choosing between venues, how to choose a wedding venue and the questions to ask before booking cover capacity and table stock.
- Place yourselves. Top table, sweetheart or a regular table with friends. Then the parents, grandparents and wedding party. Once these are down you have placed a quarter of the room and settled most of the decisions that cause arguments.
- Group before you place. Bride's family, groom's family, school friends, university friends, work, neighbours, parents' friends. A 74-person puzzle becomes eight or nine table-sized ones. Let each set of parents seat their own friends; The Knot's planners note it keeps them out of the rest of the plan.
- Zone the room. Family and wedding party nearest the dance floor and the speeches. Grandparents and older guests away from the speakers and near the exits and toilets without crossing the dance floor. Anyone with a mobility need on a clear route, with their chair removed in advance. Nobody with their back to the speeches if you can help it.
- Smooth the individuals. Every guest should know at least one person at their table. Debrett's asks for one extrovert per table and generations roughly matched. Keep friend groups intact and put related groups at adjacent tables rather than splitting them to force new friendships.
- Check, then have someone else check. Every confirmed guest has a seat; no seat has two names; every plus-one with a real name is next to their named guest; the dietary flags match the RSVP list. This is where the detail you gathered at RSVP pays off, which is why how to track wedding RSVPs matters months before the plan does.
- Hand off. The venue gets the plan with dietary needs highlighted, the printer gets the names, the coordinator gets two paper copies, and you stop touching it.
The awkward cases
Every wedding has four or five of these. Tick the ones that exist at yours and the placement rules appear as a checklist you can copy next to the guest list.
Which of these apply to your wedding?
Tick the situations you have and copy the rules into your notes. Each one is a placement decision, not a conversation to have at 1am the night before.
Your placement rules
No situations selected
Tick the situations that exist at your wedding and your placement rules appear here.
Two of these deserve a sentence more. The singles table is rejected by The Knot, Hitched, TopTablePlanner and the independent UK tool blogs alike, for the same reason: guests recognise the set-up and feel filed. And on plus-ones, decide your rule before the invitations go out, using how to handle plus-ones, so that every companion arrives at the plan with a real name and not as a mystery chair.
Children, teenagers and grandparents
Children under eight sit with their parents. A kids' table works from four or more children of similar age who know each other, within sight of a parents' table, with something to do during the speeches. Teenagers dislike a kids' table; seat them with family or together at one end. Grandparents sit away from the speakers, with a clear view.
Ode's UK guidance is under-tens with parents; The Knot and most independent tools say under eight. The difference does not matter much. What matters is that a kids' table you cannot see from the parents' table has seated the parents within sprinting distance anyway, so either put it beside them or do not run one. Ask the venue for high chairs by name and count them into the table's seat total, because a high chair takes the width of an adult chair and a half.
Some venues cap children. Farbridge's terms, to take one published example, allow no more than ten children under ten without permission and recommend a crèche if more attend. If you are having an adults-only day, the wording is a separate job covered in adults-only wedding wording.
For grandparents and older guests, the rules are physical rather than social: as far from the PA and band as the room allows, a clear sightline to the couple and the speeches, a short walk to the toilets that does not cross the dance floor, and a relative at the same table who will fetch, carry and translate a mumbled best man. For guests with a mobility need, the minimums are a clear route at least 90 cm wide from the door to their seat, the dance floor, the toilets and the exit, a chair removed from their place before the room opens, and a table whose apron does not block their knees. Send them the layout in advance.
Suppliers on the day
Photographers, videographers, the band or DJ, a toastmaster and a planner eat, but not on the guest plan. They take a supplier table set apart or a staging room, in shifts so someone always covers the room, served straight after the top table. Mark the supplier area on the floor plan and put their meal time in the run sheet.
The Knot's vendor-meal guidance is the clearest on who is fed: the people who are with you for eight hours, so photographer, videographer, musicians and their technicians, planner and entertainers. Florists, hair and make-up, the officiant and catering staff are not usually included unless they stay for the evening. Check your contracts; many UK photographers and bands write a hot meal into their terms, often timed with the top table so they are free to shoot the speeches. Count supplier meals in the number you give the caterer, but keep them off the seated guest count.
No-shows, late changes and the day itself
Plan for a small number of confirmed guests not arriving, hold one or two empty seats at a couple of larger tables rather than a spare table, and leave a single cancellation's seat empty. Only redraw the plan if a whole table collapses. The caterer bills the number you confirmed, so do not shave it down in hope.
Planners use 5 to 10 percent of accepted guests as a working allowance for late drop-outs and no-shows; nobody publishes a reliable UK figure, so treat it as a buffer, not a statistic. The buffer is cheap: an empty seat at two or three of the larger tables absorbs a surprise partner without anyone noticing, and it costs nothing if unused. A whole spare table announces itself.
When a guest cancels in the last week, leave the seat. The caterer re-spaces the chairs and a table of seven at a round for eight looks like a table of seven. Act only if three or more guests from one table drop out, or one guest is left stranded with strangers; then move people by a quiet word at the door, not by reprinting the board. Debrett's method still holds: a few contingency name cards in the coordinator's pocket, the best man or chief usher relaying changes to the caterers, and the couple carrying nothing.
Two printed copies of the final plan go to the venue coordinator and one stays with your point person, who should not be you. If your plan lives in a shared tool, the coordinator sees the same version you do and there is no argument about which printout is current.
What the venue and caterer need from you
With the final numbers, most UK venues want the table plan itself, dietary requirements against each name, and menu choices per guest where the menu was pre-ordered. Debrett's list from the caterer's side is still current: a plan highlighted for dietary needs, an envelope of place cards per table for laying up, and one named person who relays late changes.
Pre-ordered menu choices are common at UK venues, which is why place cards matter more here than on American pages. If guests chose their main course on the RSVP, the waiter has to know which plate goes to which chair, so either the place card carries a discreet code or the caterer receives a seat-by-seat list. Ask the venue which they prefer before you design the cards. Dietary restrictions are usually passed privately on the list rather than printed on the card. The University of Aberdeen's terms, asking for numbers, menu, drink choices and table plans together 14 days before, are a typical statement of what a venue wants and when.
If the caterer is separate from the venue, send them the same document, plus the room plan with the supplier meal area and the service route from the kitchen door marked. Debrett's adds a line most couples forget: access routes for the caterer and the photographer must be considered when the tables are placed. A round parked in front of the kitchen door will be moved on the morning, and your plan with it.
Spreadsheet, app or visual planner
A spreadsheet works up to about 60 guests if one person owns it. Above that, a tool linked to your RSVP list saves the re-typing, and one that draws the room to scale stops you planning tables the room cannot take. Pick by the output you need: a printed list for the venue, a to-scale room, or both.
The tools below are the ones UK and US couples use for this. Each is described by the job it does best.
| Tool | Best for | Where it runs | Price | What comes out |
|---|---|---|---|---|
| Saventify visual table planner | Seating confirmed RSVPs in a room drawn to scale, with collaborators in the same plan | In the browser, inside the invitation | Included in the one-time price of the invitation | A saved picture of the room and a table column in the guest Excel export |
| Hitched Table Planner | UK couples who collect RSVPs through a Hitched wedding website and want a free drag-and-drop chart | In the browser | Free | Chart or list view, printed, emailed or exported |
| TopTablePlanner | A cheap UK planner with UK and US top table diagrams and printouts for the venue | In the browser | Personal £10, Personal Plus £15, Professional £40; a single payment for 6 or 12 months | Printable and emailable plans, unlimited guests and tables |
| The Knot Guest List and seating | US couples already using The Knot's guest list and RSVP | In the browser and the app | Free | Seating tied to the guest list; manual updates when RSVPs change |
| WeddingWire Seating Chart | A free floor plan with dance floor and DJ booth blocks, synced to the guest list | In the browser and the app | Free | Visual or list export, print or email |
| Zola Seating Chart | Zola guest list users who want group tags, dietary labels and a print-ready PDF | iOS app | Free tier; paid above a guest limit, per Zola's help centre | Print-ready PDF for the venue and for the printed display |
If you want a printed alphabetical list or a PDF floor plan for the venue, Hitched, TopTablePlanner and Zola produce one. If you want to see whether nine rounds and a top table fit a barn with a pillar in the middle before you commit to a layout, you need a planner that draws the room at real size.
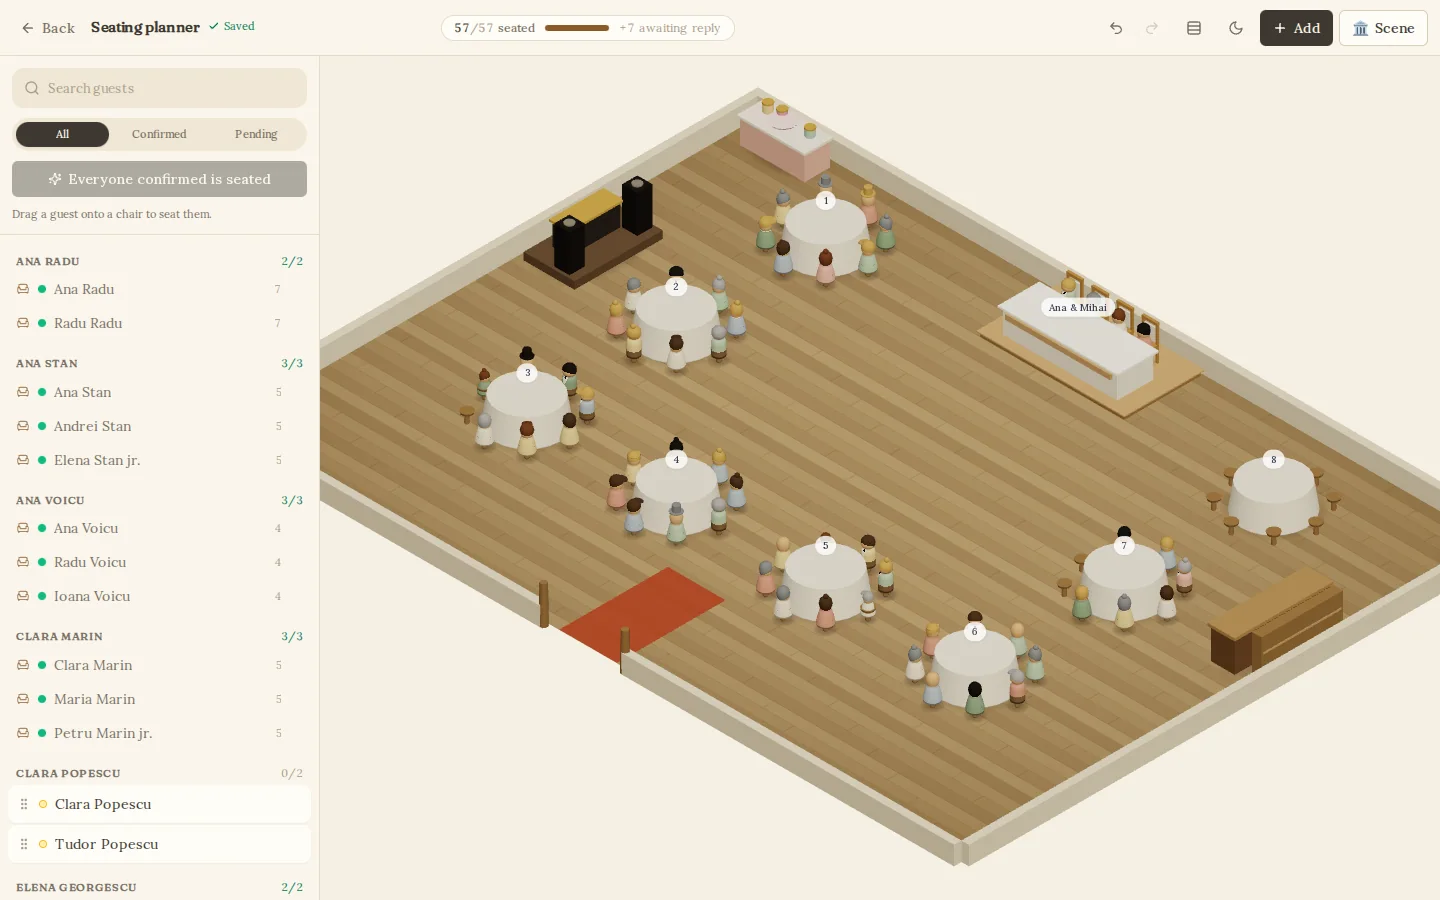
Saventify's planner is part of the invitation, at no extra cost. Guests who confirmed through the invitation's RSVP arrive grouped by family. The room is drawn to scale in 3D with round tables, long tables, the couple's table and the venue's own furniture, so a 5ft round is a 5ft round and the 150 cm walkway is visible. You drag each guest onto a chair or use auto-seat for the rest, and a counter shows how many confirmed guests are still standing. Anyone who shares the invitation with you works in the same plan.
What comes out is deliberately small: a saved picture of the finished room, and the guest Excel export with a table column for each family. For the printed board, the place cards, an alphabetical list for the venue or a catering report, use the tools above; that is the criterion they serve. The planner's job is the step before, from a confirmed RSVP list to a room you have seen.
If it were our wedding
We would decide the top table question first and tell both sets of parents before anyone else hears about it. We would ask the venue for the floor plan and the exact table stock in the same email as the booking, choose 5ft rounds for the guests and one long family table for us, and put the RSVP deadline five weeks out so the plan is an evening's work with confirmed names rather than a fortnight of guessing.
Then we would place ourselves, the parents and the grandparents, group everyone else, and leave two empty seats at the two biggest tables. Names go to the printer two weeks out, the venue gets the plan with the dietary list the same day, and from then on the coordinator holds the pen.
The plan is the last step of a system that starts with the guest list. The earlier stages, making the guest list, handling plus-ones, tracking RSVPs and chasing guests who do not reply, live in our guest list and RSVP guide; the wedding planning timeline shows where the plan sits in the wider schedule. When you are ready to collect the replies the plan will be built from, choose a template and switch on the RSVP.
Wedding table plan questions, answered
Confirmed replies make the table plan an evening's work
Send the invitation, collect every RSVP in one place, and seat the confirmed guests in a room drawn to scale when you are ready.
See the templates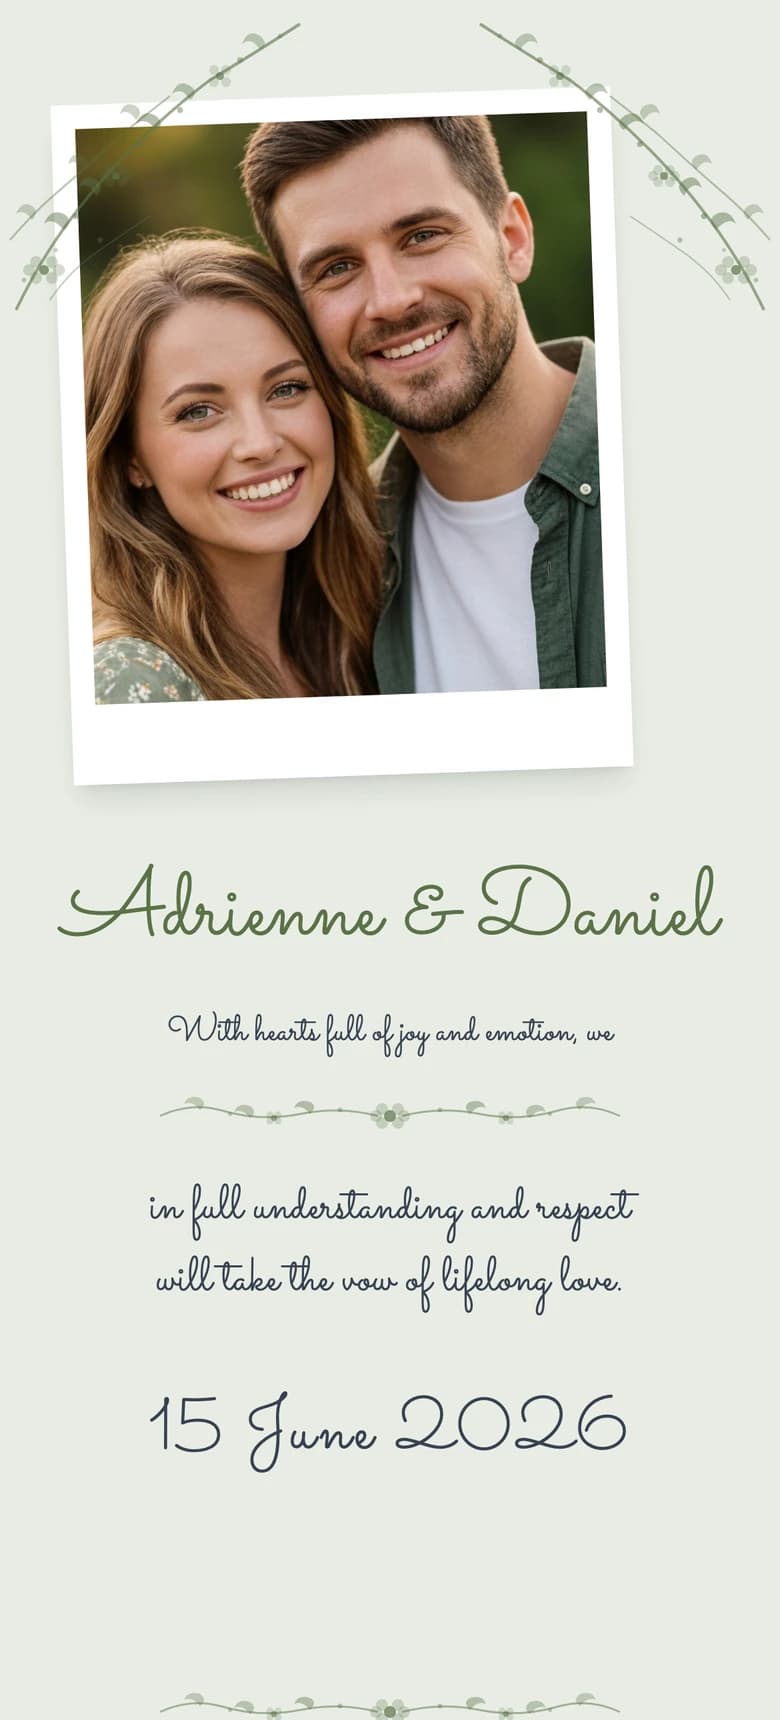

About the author
Wedding invitations, RSVP and save the date
Larisa writes the Saventify wedding guides. She covers digital invitations, save the dates, RSVP, guest lists and the templates couples actually send.
All articles by LarisaTable of Contents
- Do you need a table plan at all?
- Table plan, escort cards or place cards: what goes at the entrance
- Who sits at the top table?
- Divorced or separated parents, step-parents and new partners
- How many guests fit at each table? UK sizes
- How many tables, and how big a room?
- The method, from RSVP deadline to venue hand-off
- The awkward cases
- Children, teenagers and grandparents
- Suppliers on the day
- No-shows, late changes and the day itself
- What the venue and caterer need from you
- Spreadsheet, app or visual planner
- If it were our wedding
Authors
- Larisa
Wedding invitations, RSVP and save the date
Previous Article
Next Article
Table of Contents
- Do you need a table plan at all?
- Table plan, escort cards or place cards: what goes at the entrance
- Who sits at the top table?
- Divorced or separated parents, step-parents and new partners
- How many guests fit at each table? UK sizes
- How many tables, and how big a room?
- The method, from RSVP deadline to venue hand-off
- The awkward cases
- Children, teenagers and grandparents
- Suppliers on the day
- No-shows, late changes and the day itself
- What the venue and caterer need from you
- Spreadsheet, app or visual planner
- If it were our wedding
Authors
- Larisa
Wedding invitations, RSVP and save the date